
3D Print Zits and Blobs 7 Easy Fixes to Prevent Them
What is the Acceleration Setting? The Acceleration setting measures how fast your print head speeds up, limited by your designated 3D printer speed in your slicer settings. The higher the setting, the quicker the print head will get to its maximum speed, the lower the setting, the slower the print head will get to its maximum speed.

3D Print Zits & Blobs 6 Tips to Prevent Them FacFox Docs
1. Ensure There is Proper Cooling of the Layers If the layers are overheated due to poor cooling, the excess melted filament will form the blobs on the printed object. You need to optimize the.
How to Prevent 3D Print Blobs & Zits
To prevent blobs and zits at the beginning or end of a print turn, you should adjust the retraction settings. It is recommended to add an additional negative retraction distance. The additional restart distance determines the difference when the extruder stops between the retraction distance and the new intake.

3D Print Zits & Blobs 6 Tips to Prevent Them All3DP
3D printer stringing is a common problem that can ruin your prints. Learn how to prevent it with these five simple solutions that cover settings, materials, and tools. Whether you are printing with PLA, PETG, or TPU, you can achieve smooth and clean results with these tips. Find out more at All3DP, your source for 3D printing guides and news.
An Update 3D Print Blobbing and How to Fix It re3D LifeSized Affordable 3D Printing
37K 2.1M views 1 year ago #Ender3Pro #3DPrinter #ElegooNeptune3 Your 3D Printer can be printing low quality prints because of "Power Loss Recovery". But how?? Surface quality depends on smooth.
Strange blobs and visible layers on a 3d print after not printing for 3 days. What should I do
Blobs und Zits sind unerwünschte Oberflächenfehler im 3D-Druck Mögliche Ursachen: Filamentprobleme, Retraction, Düsenabstand, Coasting und Materialfluss Lösungen: Coasting, Wiping, Temperaturanpassung, Lüftergeschwindigkeit, Druckgeschwindigkeit, Startpunkte anpassen, Nozzle reinigen, Filament prüfen Das erwartet dich in diesem Beitrag
Lessons in 3D Printing Blobs, Warping, Gaps, Ugly Overhangs, and other disasters with gravity
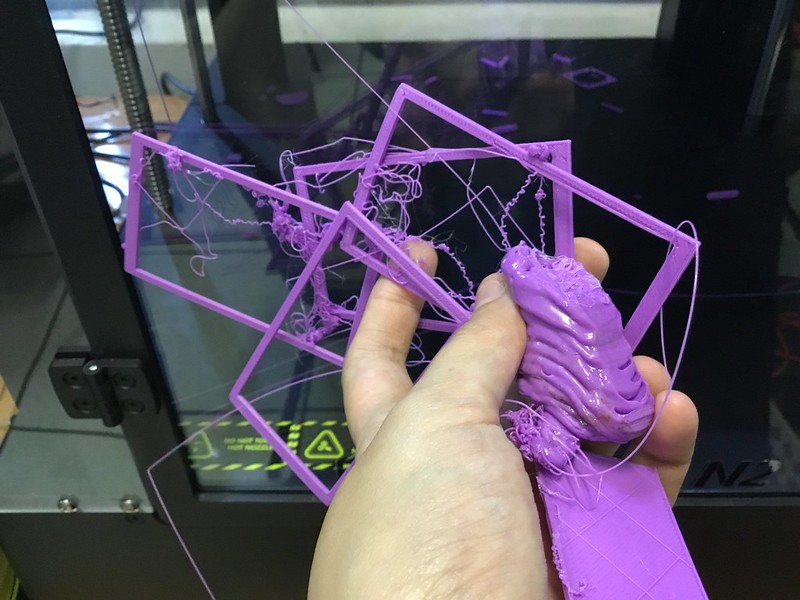
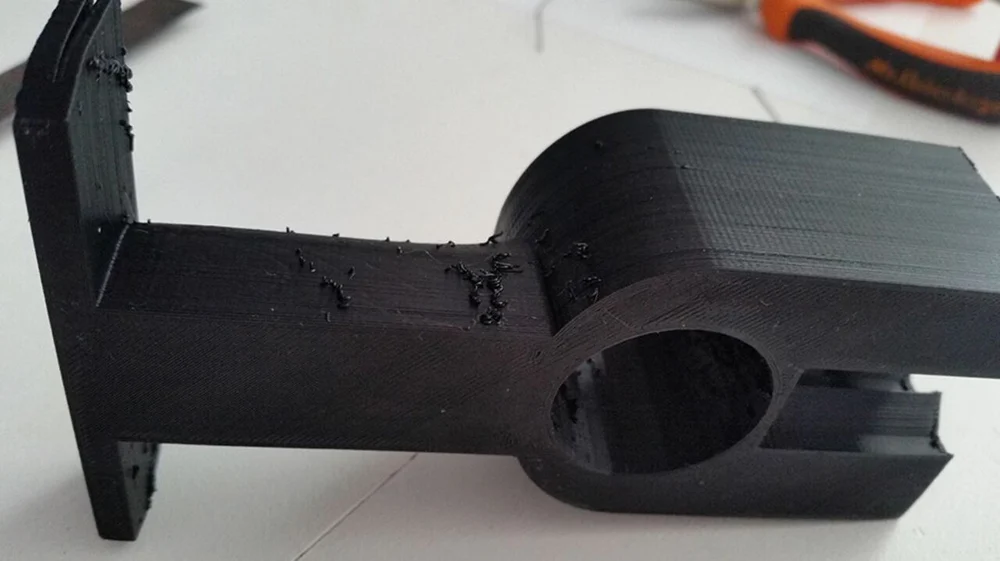
Over-extrusion, high temperatures, and incorrect retraction settings are some common causes of blobbing on 3D prints. Over-extrusion occurs when pressure builds up inside the nozzle and is released at the end of a layer. Blobbing can also occur at the start of a layer if the retraction is too high. It's important to identify the reason for.
3D Printing Blobs and Zits Tips to Avoid Them
Print Quality Troubleshooting Guide. This guide is a great place to start if you are trying to improve the quality of your 3D printed parts. We have compiled an extensive list of the most common 3D printing issues along with the software settings that you can use to solve them. Best of all, the guide uses a large collection of real-world images.
Blobs & Zits (Kleckse/Pickel) im 3D Druck Vermeiden
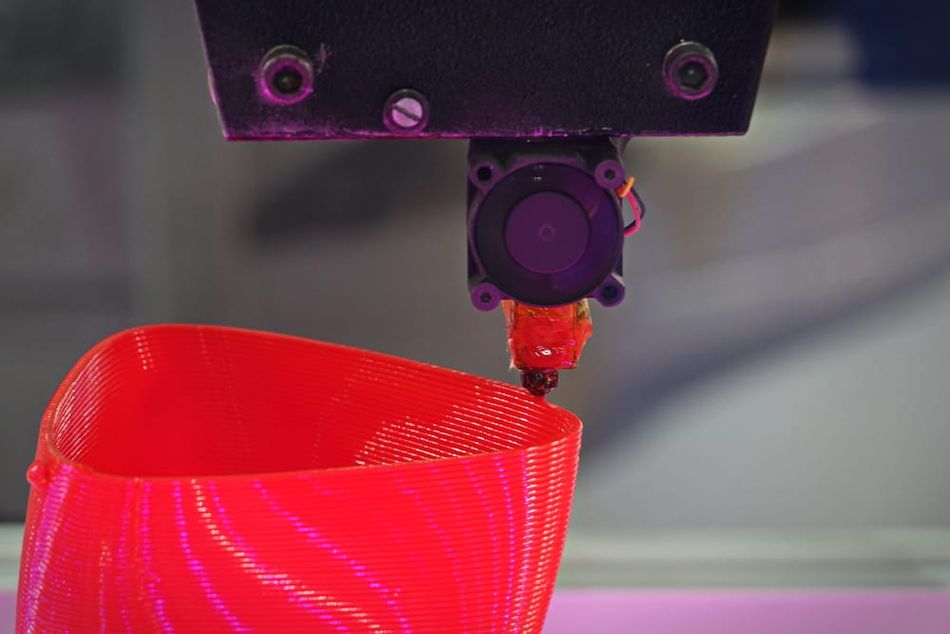
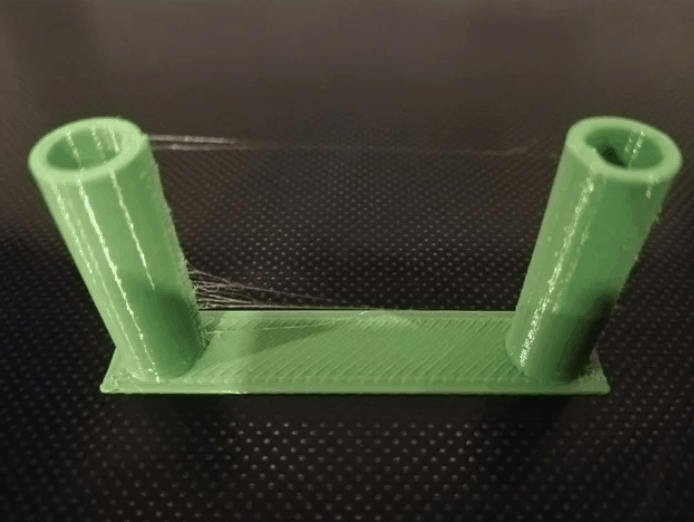
Pickel, Blobs und Zits treten auf, weil der Extruder während des 3D-Druckvorganges sehr oft startet und wieder stoppt. Blobs entstehen also dort, wo der Extruder mit dem Print eines Abschnittes der Außenhülle gestartet hat und nach dem 3D-Print des Umfangs wieder zu dieser Stelle zurückkehrt.
How to Prevent PETG Blobs and PETG Stringing? (Detailed) 3D Print Beast
Blobs can occur when the built-up pressure inside the extruder nozzle pushes out more plastic than intended. If you notice that the blob is happening as the extruder finishes printing a perimeter, you may want to adjust a setting called "coasting."
3D Printing Blobs and Zits Tips to Avoid Them
When it comes to surface defects on 3D prints, there are numerous concerns. For example, we have previously discussed solutions to avoid issues like scars or scratches on the top surface of 3D prints. Today, we are going to solve another defect issue: 3D print zits and blobs. Generally, inconsistencies in extrusion on the surface of printed objects result from mechanical hardware and print.
3DDruckerGuide Kleckse, Pickel, Blobs & Zits Vermeiden
Do you want to improve the quality and appearance of your 3D prints? Do you struggle with blobs and zits that ruin the surface of your models? In this article, you will learn what causes these defects and how you can prevent them with six easy tips. Whether you need to adjust your retraction settings, your temperature, or your cooling, you will find the solution here. Don't let 3D print zits.

Is there a way to fix the blob of plastic when a new layer begins. Cura. 3Dprinting
The best way to fix blobs or zits on a 3D print is to adjust your print settings such as retraction, coasting, and wiping to give better instructions to your 3D printer to prevent these print imperfections. Another group of key settings relates to the 'Outer Wall Wipe Distance' and Resolution settings. This is the basic answer so keep on.
3D Printing Blobs and Zits How to Avoid Them
Heat Up Nozzle & Scrape Off Blob. The main method in order to fix the 3D printer blob of death is to heat up the nozzle and scrape off the blob. To do that first heat the hotend to the print temperature or the minimum filament temperature. The extruded material will become soft and can be scraped off, but be cautious not to damage the hotend or.
Zits & Blobs im 3DDruck 6 Tipps, um sie zu vermeiden FacFox 3DDruckservice Wissen
© 2023 Google LLC I'm currently testing the Alfawise U30 Pro and the Ender 3 Pro in a side-by-side comparison. The Alfawise showed strange blobs on parts, even printed in vase.
3D Printer Zits and Blobs Let's Cope with It!
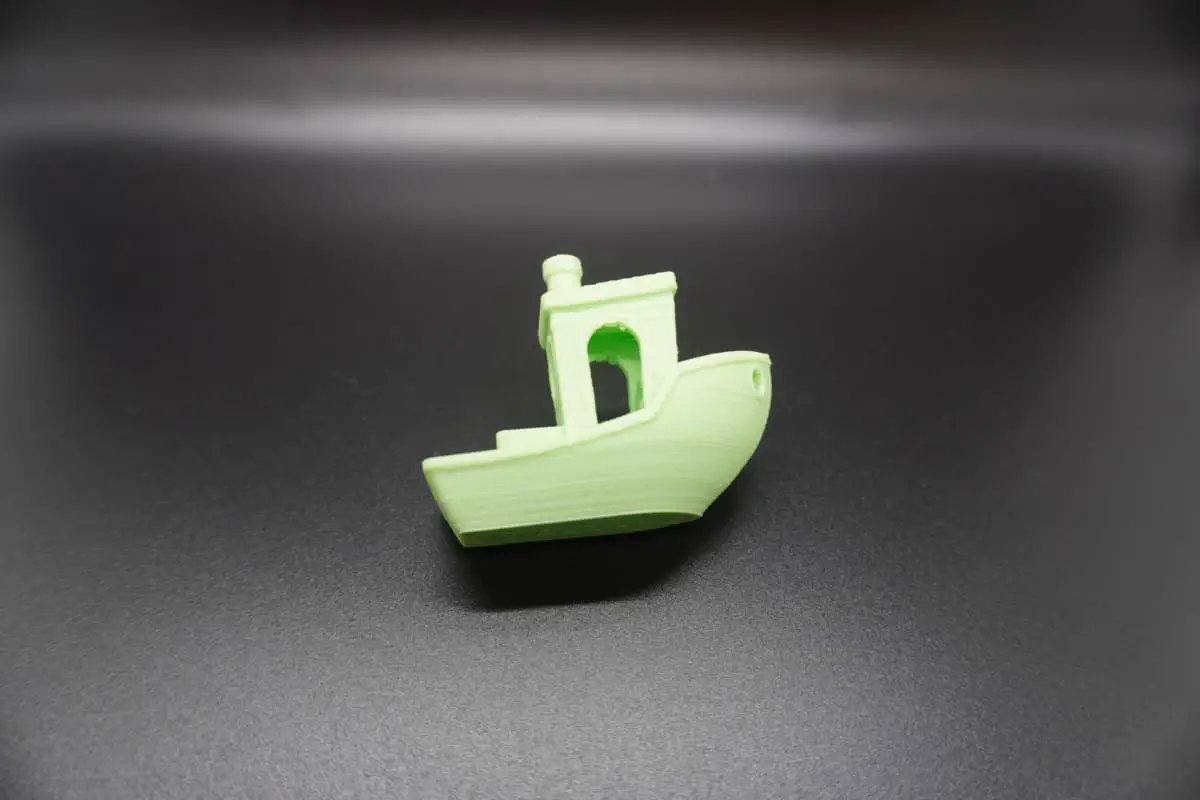
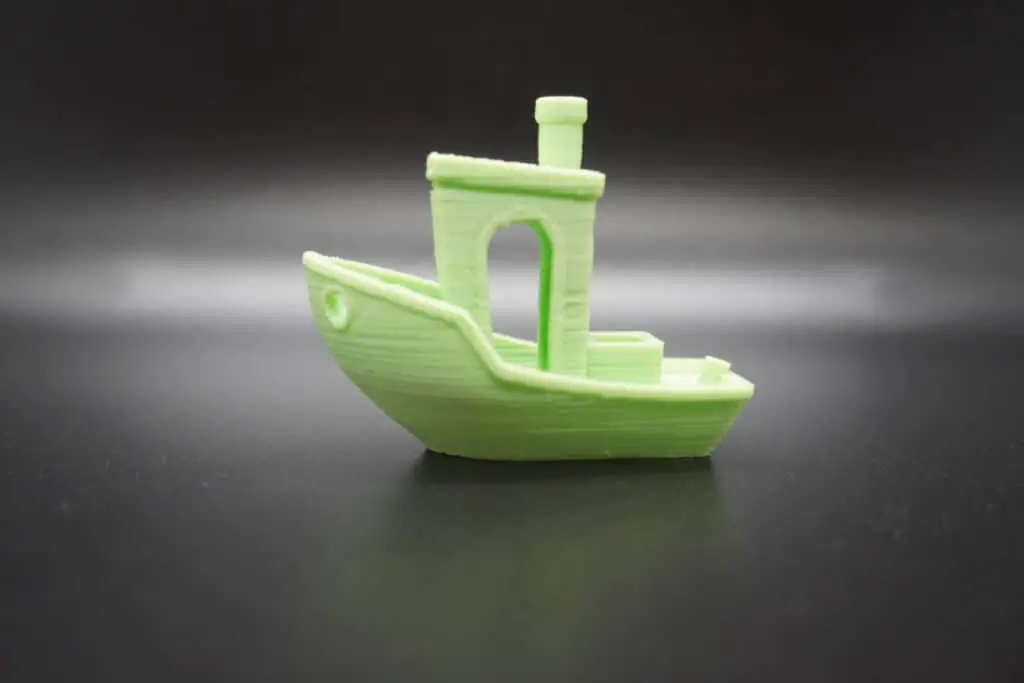
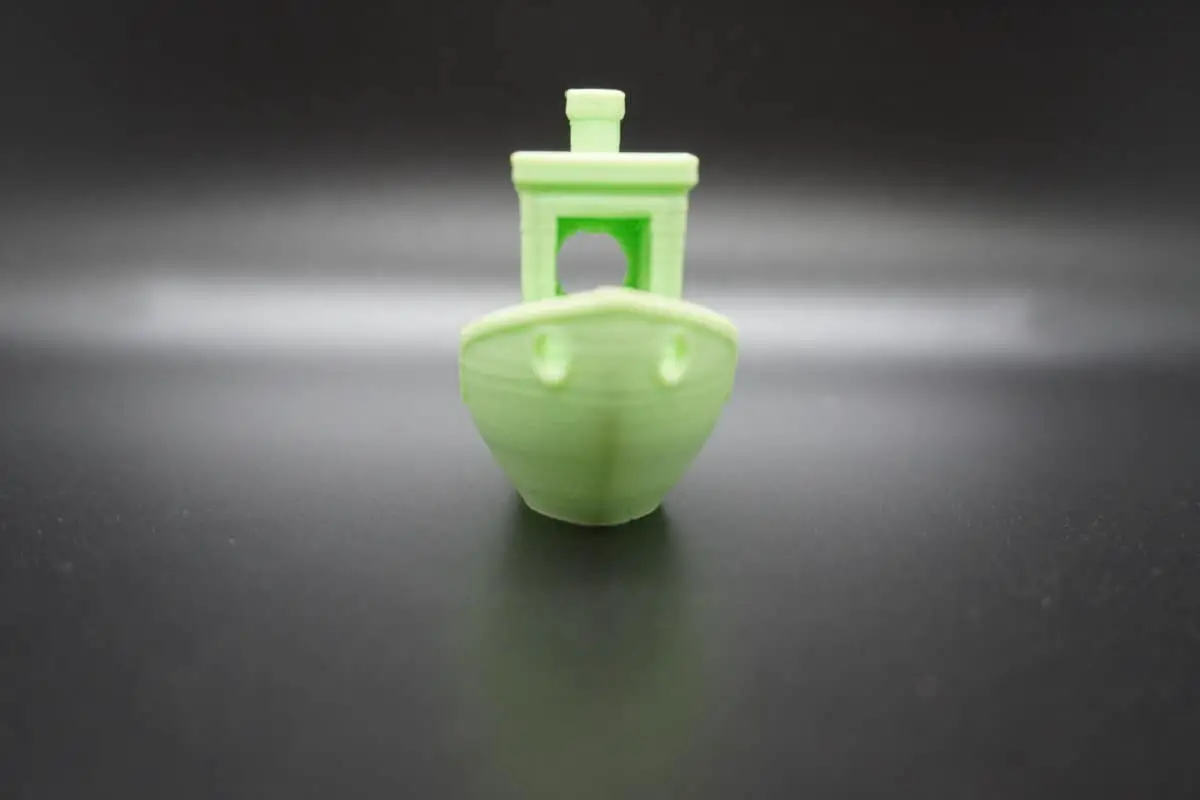
What Are 3D Print Blobs and Zits and Why Are They Bad? Blobs and zits in 3D printing are unwanted bubbles of over-extruded filament on a 3D printed model's shell that should otherwise look smooth and clean, ruining surface finish. Source: Reddit
