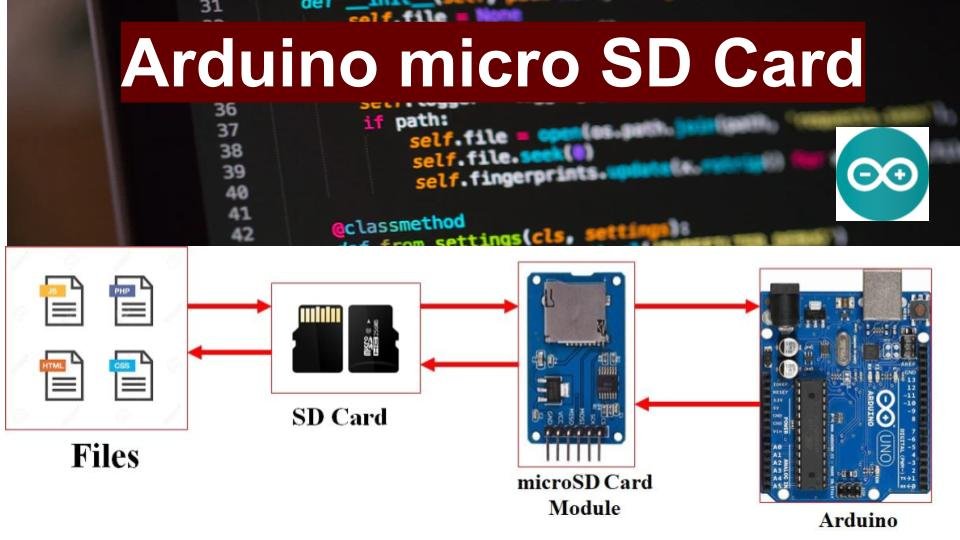
Micro SD Card Interfacing with Arduino using MicroSD Module
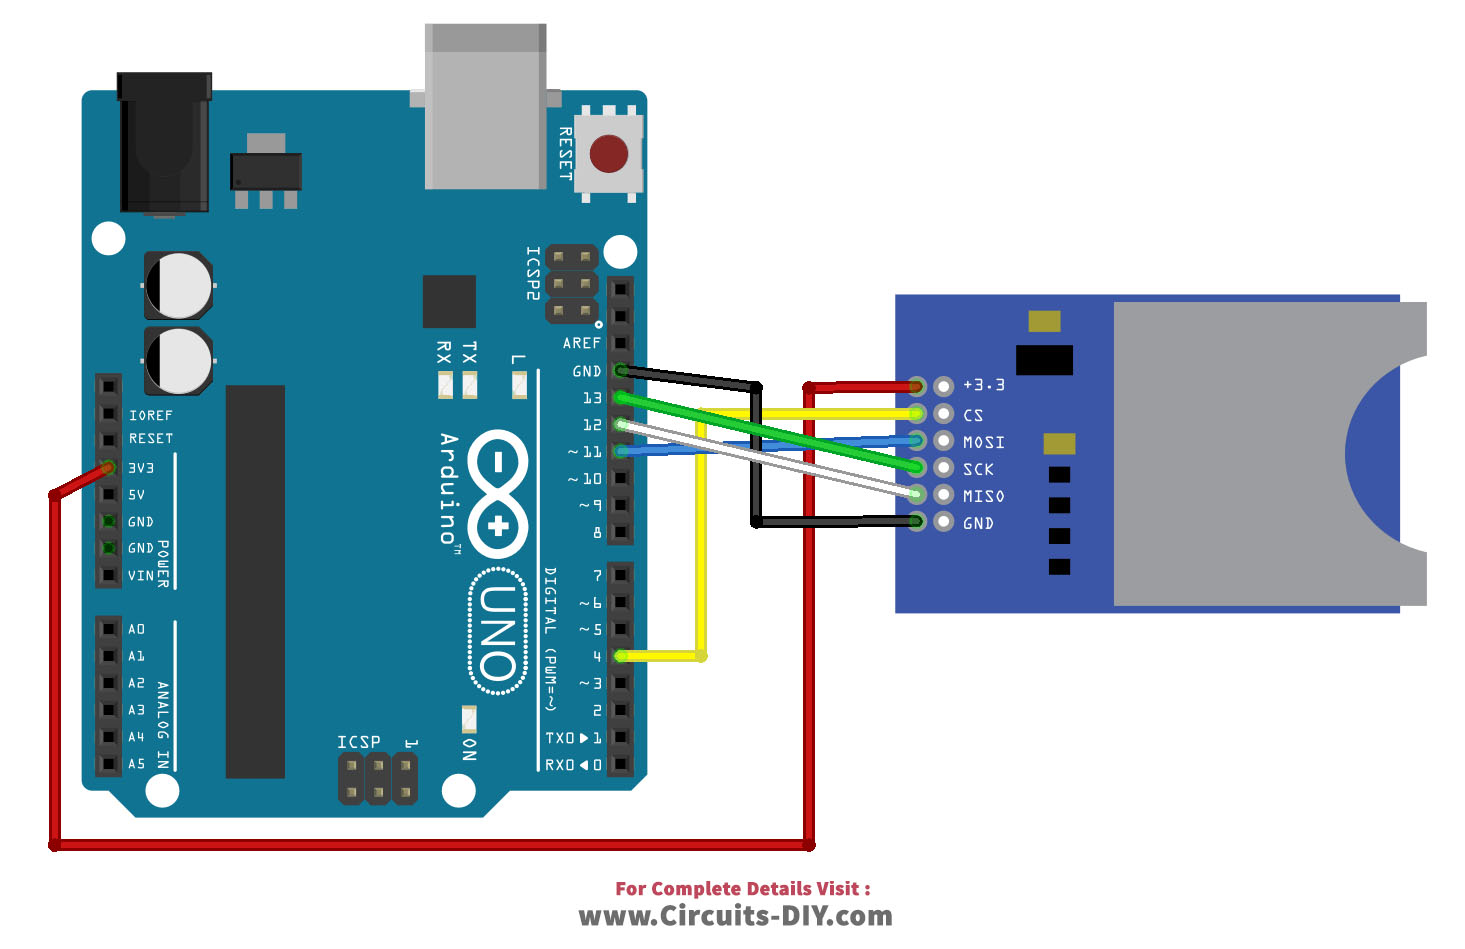
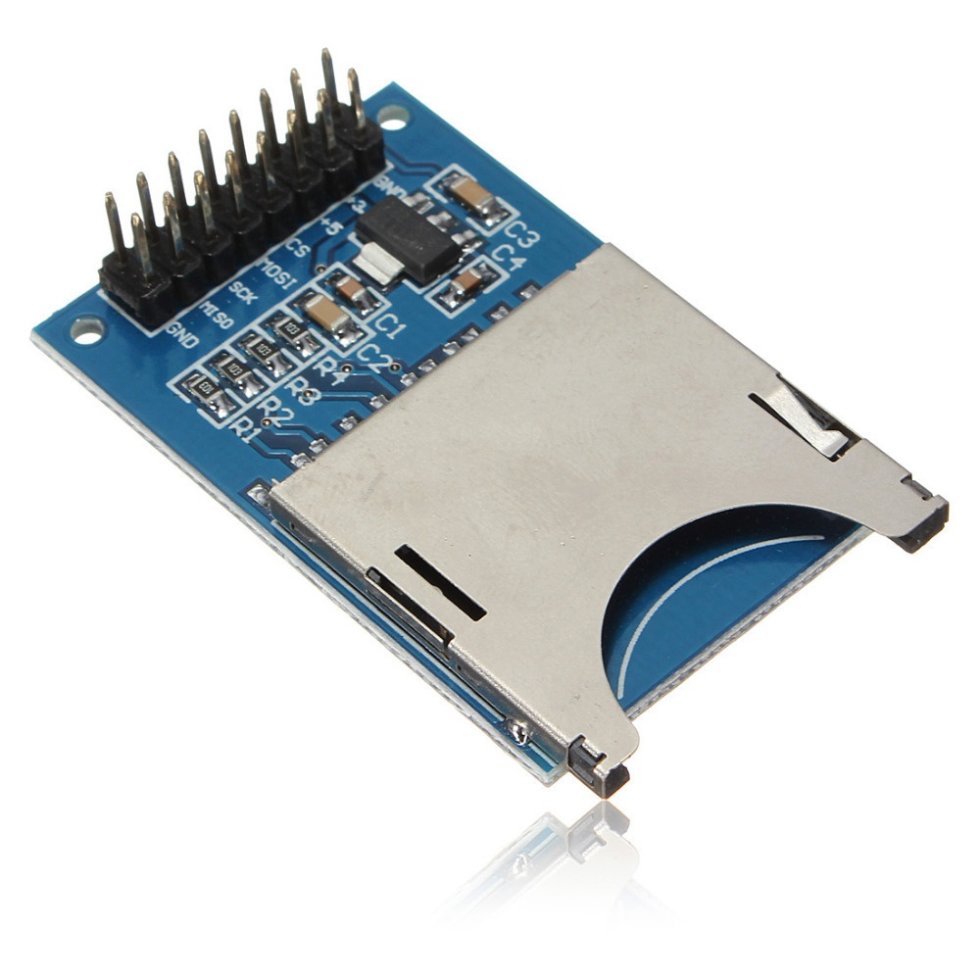
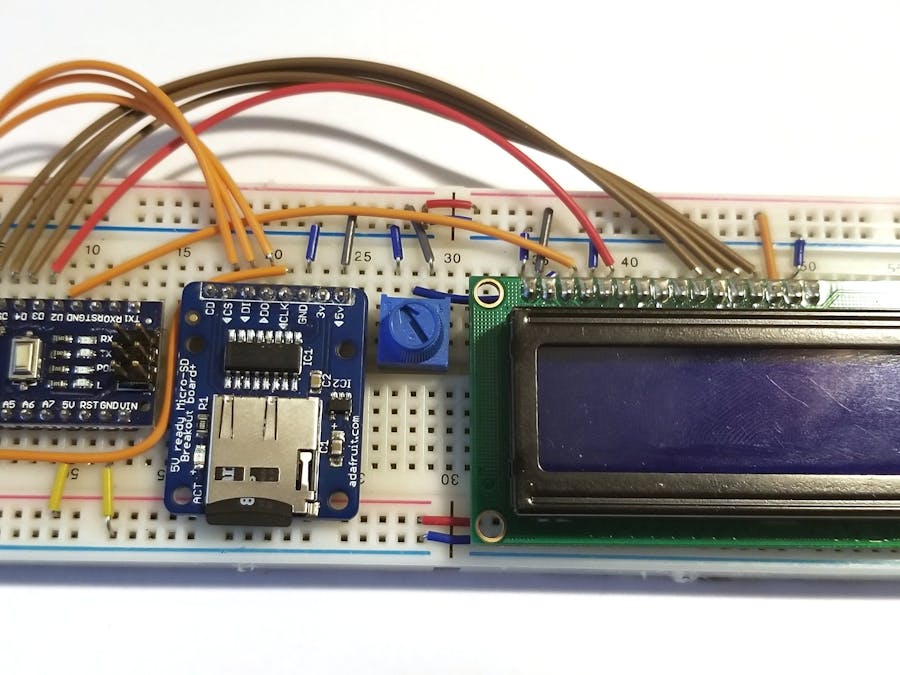
Step 1: SD Card Module. We need to connect 6 wires with SD card with arduino, where 4 wires are connected to Arduino Data pins and 2 wires are connected to Vcc and GND. Some features of SD Card Module are given below.1. It Supports SPI (Serial Peripheral Interface ) Interface (So we need to connect four wires with arduino).2.
How to Interface Mini SD Card Module with Arduino UNO
Hence, Arduino and SD cards are a good combination for data logger projects. The SD cards can store many images which you can use in games, navigation menus, Point Of Sale terminals, and more. You can also store text files and display them in your e-Book reader project. SD Cards are tiny memory cards that provide you a lot of storage space.

SD Card Arduino SD Card With Arduino YouTube
Quick Steps. Make sure that the Micro SD Card is formatted FAT16 or FAT32 (Google for it) Copy the above code and open with Arduino IDE. Click Upload button on Arduino IDE to upload code to Arduino. See the result on Serial Monitor. COM6.
Arduino SD Card Reader Technology Tutorials
Circuit Here is an example of how to insert an SD card into the MKR Zero board. None of the examples below requires any additional circuit. Insert the SD card. Examples Below are a series of examples Read and Write This example shows how to read and write data to and from an SD card. In setup() , create a new file with SD.open() named "test.txt".
Microcontroller Monday Read and Write to an SD card with Arduino
SD Card Experiments with Arduino Table of Contents [ show] Introduction Secure Digital, or SD, Cards are used in a variety of applications. You likely have several of them in your electronic devices as they are used in phones, tablets, cameras, and music players.
Read and write on a SD card with Arduino • AranaCorp
March 07, 2019 by Daniel Hertz Learn how you can use an SD card module for data-heavy Arduino projects that require more memory. Materials Project Resources Hardware Some projects may collect a large amount of data, such as sensor data read over the course of a month, that you want to store permanently.

Arduino music player from SD card tutorial YouTube
Home Microcontroller Based Projects How Does a Micro SD Card Module Work and How to Interface it with Arduino? How Does a Micro SD Card Module Work and How to Interface it with Arduino? Published May 25, 2022 0 D Debashis Das Author Arduino Micro SD Card Module Project

Using SD Card Module with Arduino Read/Write/Data Logger
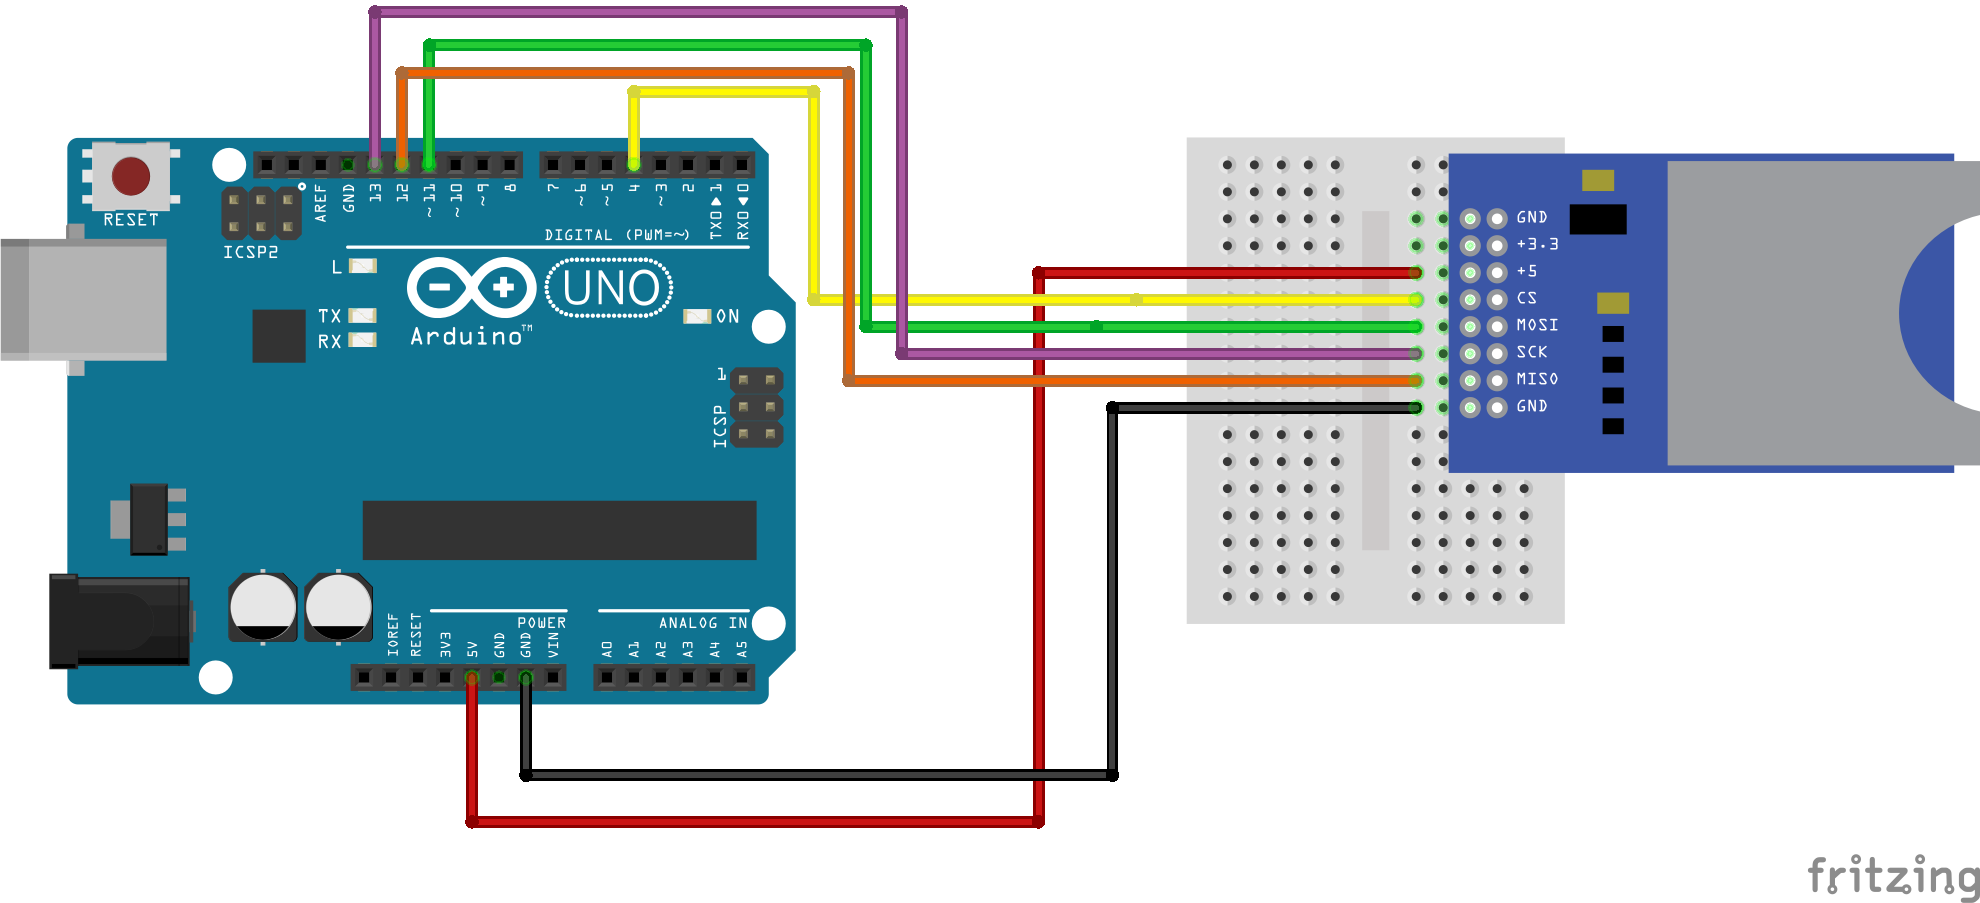
What you need to know when using SD cards with Arduino The first. Cards are designed for 3.3 V. Amperage can reach large values: up to 100 mA and even more when recording data! This means that you have to provide a quality 3.3 V power supply for the card. Besides, it is necessary to have a 3.3 V power supply for logic.
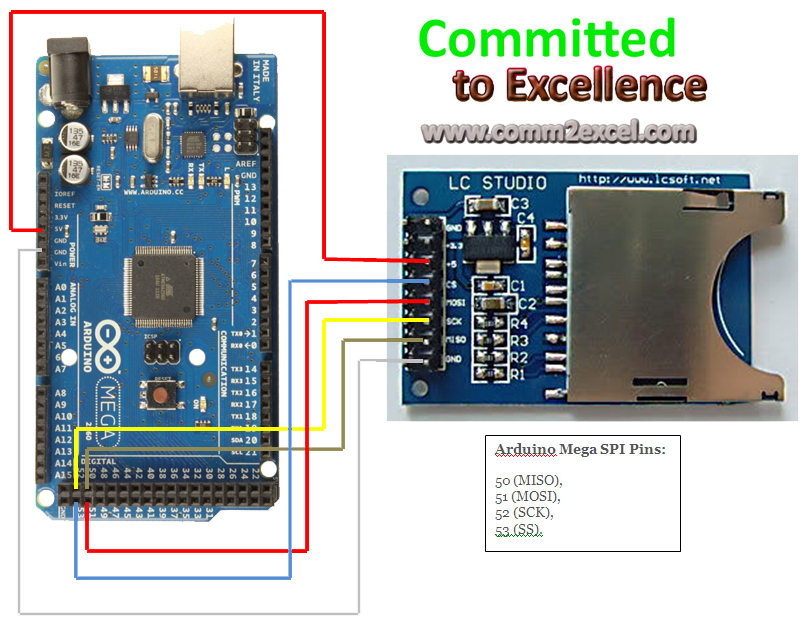
Arduino arduino mega 2560 connect SD
This is a great project to learn how to use the SD card module with Arduino to build a data logger. You can apply this concept in pretty much any project you'd like. If you like Arduino projects, make sure you check our latest Arduino course: Arduino Step-by-step Projects - Build 23 Projects. We hope you've found this project useful.
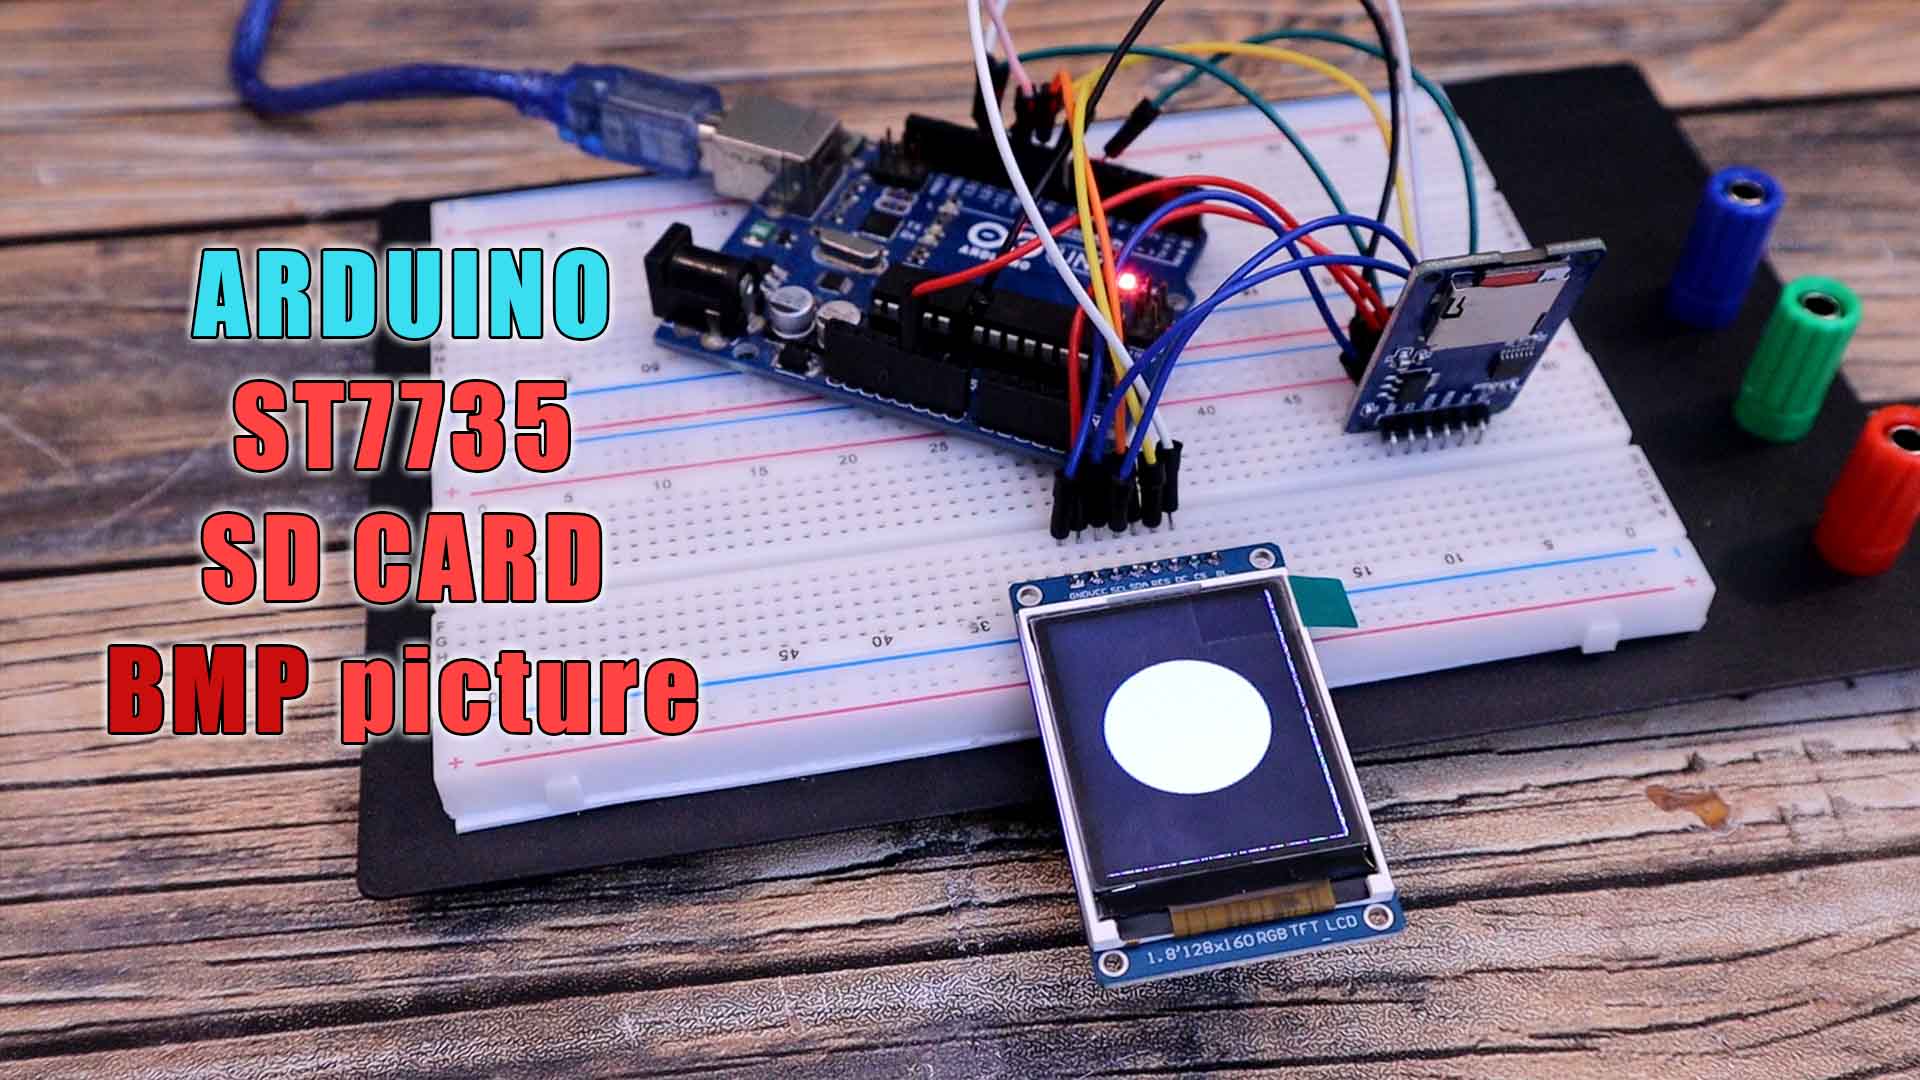
Arduino ST7735 SD card bmp picture tutorial
We can use the SD Card Module to add the desired memory to the Arduino project to store the data, Media, etc. The Micro SD Card Reader Module is also called a Micro SD Adaptor. The Module is a simple solution for transferring data to and from a standard SD card.

Arduino project SD card interface Part 2 (read and write on SD card ) YouTube
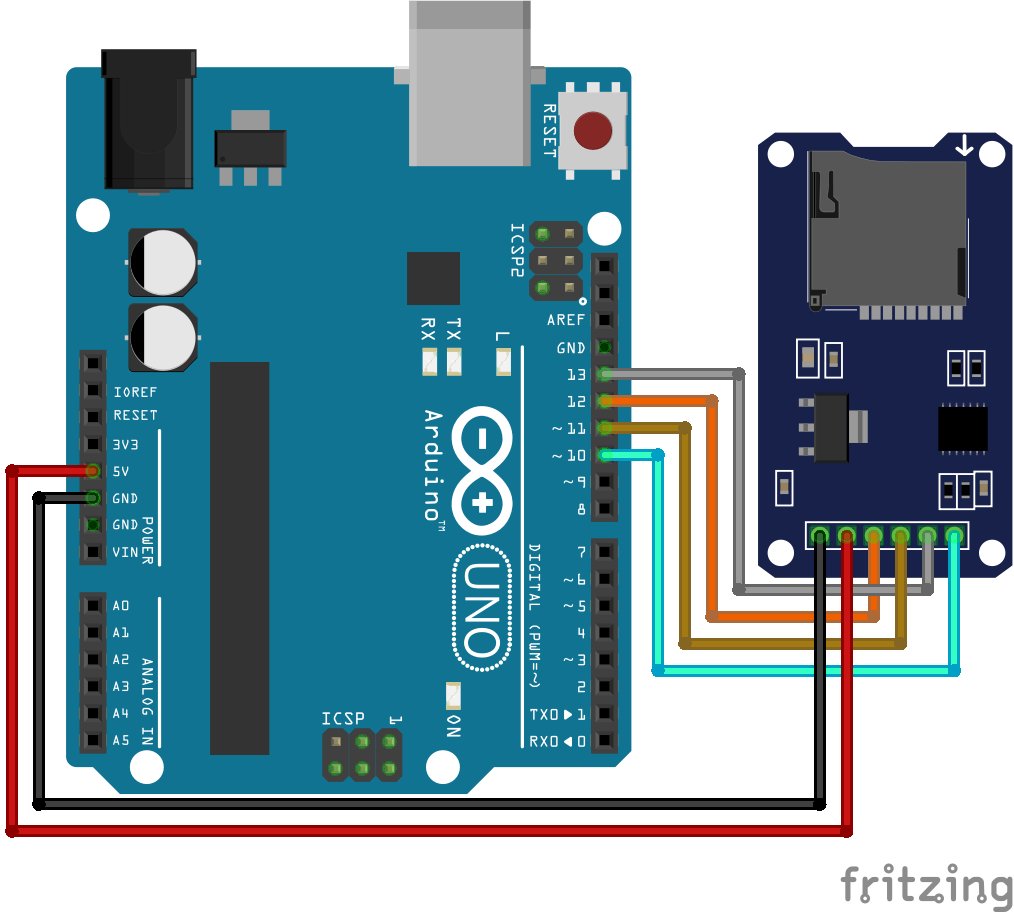
Hardware Overview The microSD card module contains two main components: A standard microSD card has an operating voltage of 3.3 V. As a result, we cannot connect it directly to circuits that use 5V logic; in fact, any voltages above 3.6V may permanently damage the microSD card.
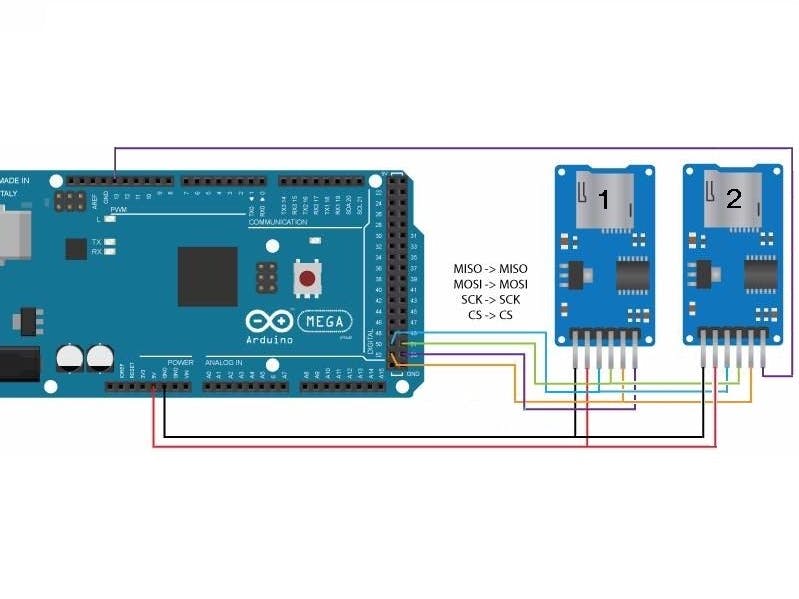
Access 2 SD cards with Arduino Arduino Project Hub
An Arduino board and an SD card reader can create various projects, including data loggers, music players, GPS trackers, and more. This section of your blog might also cover the specific components required for using an SD card with an Arduino, such as a microcontroller, wires and libraries. Setting up the Arduino and SD Card Reader
Reading Text Files From an SD Card (Arduino) Arduino Project Hub
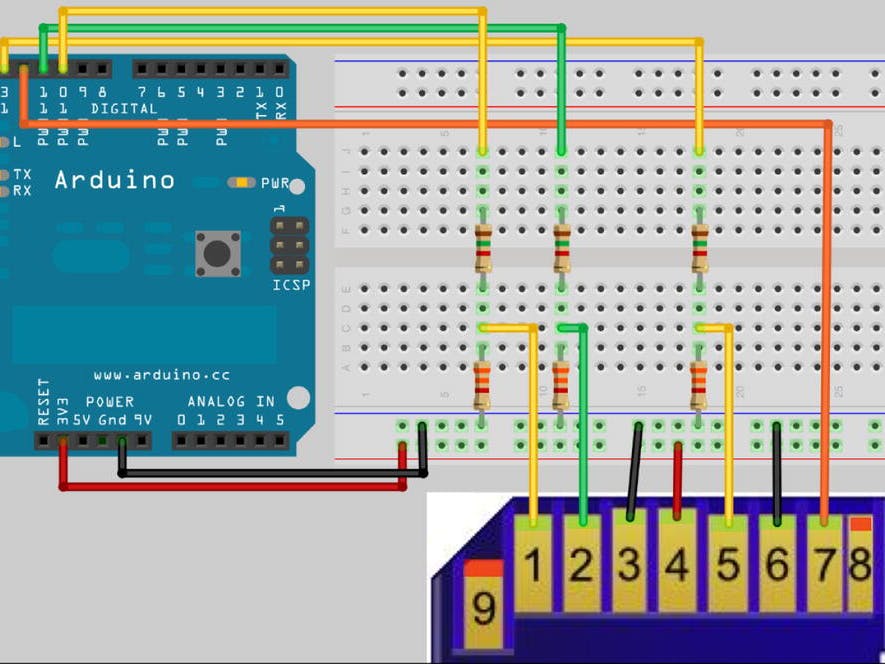
The communication between the microcontroller and the SD card uses SPI, which takes place on digital pins 11, 12, and 13 (on most Arduino boards) or 50, 51, and 52 (Arduino Mega). Additionally, another pin must be used to select the SD card. This can be the hardware SS pin - pin 10 (on most Arduino boards) or pin 53 (on the Mega) - or another.
Simple SD Card/Read Write Arduino Arduino Project Hub
SD card LM386 Audio Amplifier 10uf Capacitor (2 Nos) 100uf Capacitor (2 Nos) 1K,10K Resistor Push buttons (2 Nos) Breadboard Connecting Wires Getting ready with your WAV audio files: For playing sounds from SD Card using Arduino, we need audio files in .wav format because Arduino Board can play an audio file in a specific format that is wav format.
Arduino nano pinout sd card atilatechno
To interface the microSD card with the ESP32 board, we'll use a microSD card module (SPI communication protocol). Using a microSD card with the ESP32 is especially useful for data logging or storing files that don't fit in the filesystem (SPIFFS). The ESP32 will be programmed using the Arduino core. In this tutorial, we'll cover the.
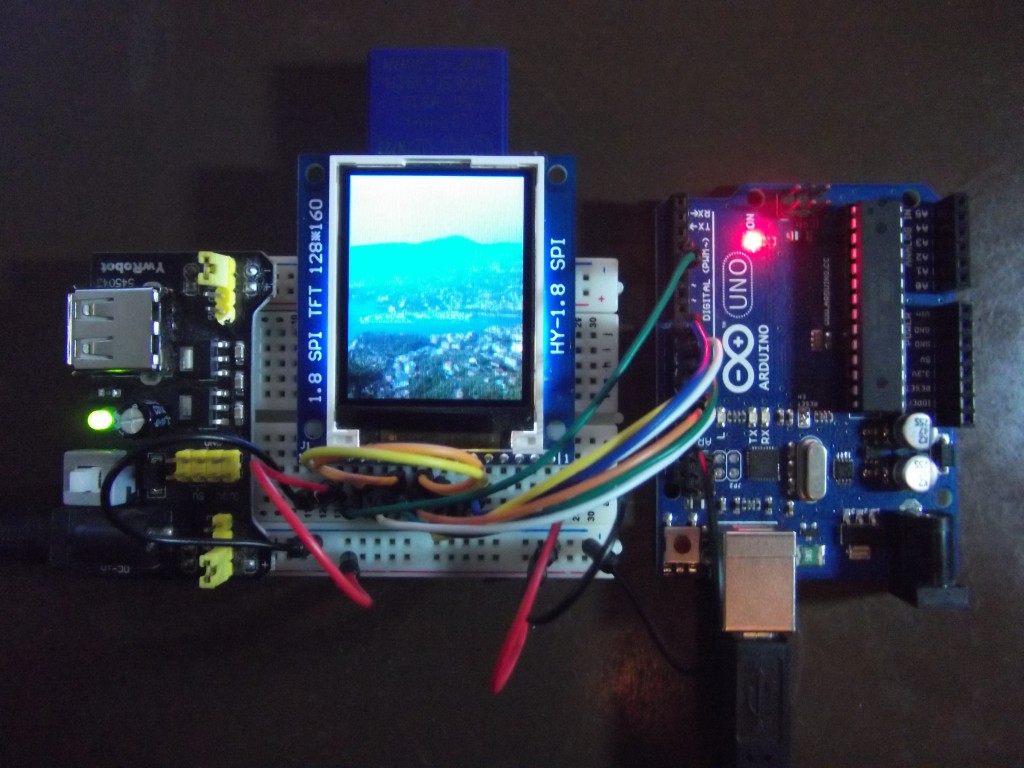
An image slideshow with an Arduino and a tft display with a sd card module simtronyx Das
i try to connect esp8266 node mcu with sd card module https://www.aliexpress.com/item/32877331401.html
